AC Not Working? Troubleshooting Guide Before You Call a Pro
By Editorial Team
Last updated: February 25, 2026
Your AC Stopped Working — Now What?
When the air conditioner quits on a 95-degree afternoon, the impulse is to call a technician immediately. But before you schedule a $75 to $150 service call, there are several common problems you can diagnose and fix yourself in under an hour — many at no cost.
This guide walks through the most likely causes of AC failure in the order you should check them. Work through each step before moving to the next.
Quick Diagnostic: Identify Your Symptom
| Symptom | Most Likely Causes | Start With |
|---|---|---|
| AC will not turn on at all | Thermostat setting, tripped breaker, blown fuse, safety switch | Steps 1 and 2 |
| AC runs but is not cooling | Dirty filter, frozen evaporator coil, dirty condenser, low refrigerant | Steps 3, 4, and 5 |
| AC short cycles (turns on and off rapidly) | Dirty filter, oversized unit, low refrigerant, failing compressor | Steps 3 and 5 |
| AC makes unusual noises | Failing capacitor, contactor issue, worn belt, motor bearing failure | Step 7 |
| Water pooling around indoor unit | Clogged condensate drain line | Step 6 |
Step 1: Check the Thermostat
The thermostat is the source of more "broken AC" service calls than most people realize.
Confirm the mode and temperature. The thermostat must be set to COOL (not HEAT, AUTO, or OFF), and the set temperature must be at least 3 to 5 degrees below the current room temperature to trigger the system on. A bump, a child, or a cleaning session can change these settings without anyone noticing.
Check the batteries. Many programmable and smart thermostats run on AA or AAA batteries. Dead batteries cause a blank display or erratic behavior. Replace them and wait 60 seconds for the thermostat to reboot.
Set the fan to AUTO. When set to ON, the blower runs continuously regardless of whether the compressor is cooling. You will feel air from the vents, but it will not be cold during the off-cycle — making it seem like the system is not cooling when it is actually between cycles.
Look for error codes. Smart thermostats display error messages or flash indicators when communication with the HVAC system fails. Consult the thermostat manual for your model.
Try a hard reset. Remove the thermostat from its wall plate, wait 30 seconds, and reattach it. This clears temporary software glitches.
Step 2: Check the Circuit Breakers
Central air conditioning systems use two separate circuits — one for the indoor air handler or furnace blower, and one for the outdoor condenser. If either breaker has tripped, part or all of the system will not function.
Locate the breakers labeled for the air conditioner, air handler, or HVAC at your electrical panel. A breaker in the middle position between ON and OFF has tripped. Flip it fully to OFF first, then back to ON. Warning: If the breaker trips again immediately or within a few minutes, do not keep resetting it. Repeated tripping indicates an electrical fault that requires professional diagnosis.
Check the outdoor disconnect. A disconnect box is mounted on the exterior wall near the condenser unit. Confirm it is in the ON position or that the pull-out fuse block is properly seated. This switch is sometimes accidentally bumped off during yard work.
Check for blown fuses. Some systems use cartridge fuses in the outdoor disconnect box. Test them with a multimeter set to continuity, or replace them with fuses of the same amperage rating (typically 30 or 40 amps, printed on the fuse body). Replacement fuses cost $5 to $10.
Step 3: Check and Replace the Air Filter
A dirty air filter is the single most common cause of AC problems — and the easiest fix. A clogged filter restricts airflow across the evaporator coil, causing reduced cooling, frozen coils, higher energy bills, short cycling, and premature compressor wear.
Locate the filter. It is typically inside the return air grille on a wall or ceiling, in a slot at the air handler, or in a filter rack between the return duct and the air handler. Slide it out and hold it to a light source. If you cannot see light through it, it needs replacing.
Replace the filter. Note the size printed on the frame (for example, 20x25x1). Insert the new filter with the airflow arrow pointing toward the blower motor. Standard 1-inch filters cost $3 to $15 and should be replaced every 30 to 90 days. Homes with pets or allergy sufferers should change them monthly.
After replacing the filter, give the system 15 to 30 minutes to recover. If a severely clogged filter caused the evaporator coil to freeze (see Step 5), the system needs longer to thaw before cooling effectively.
If you are unsure what size system your home needs, our HVAC sizing calculator can help you determine the right capacity for your square footage and climate zone.
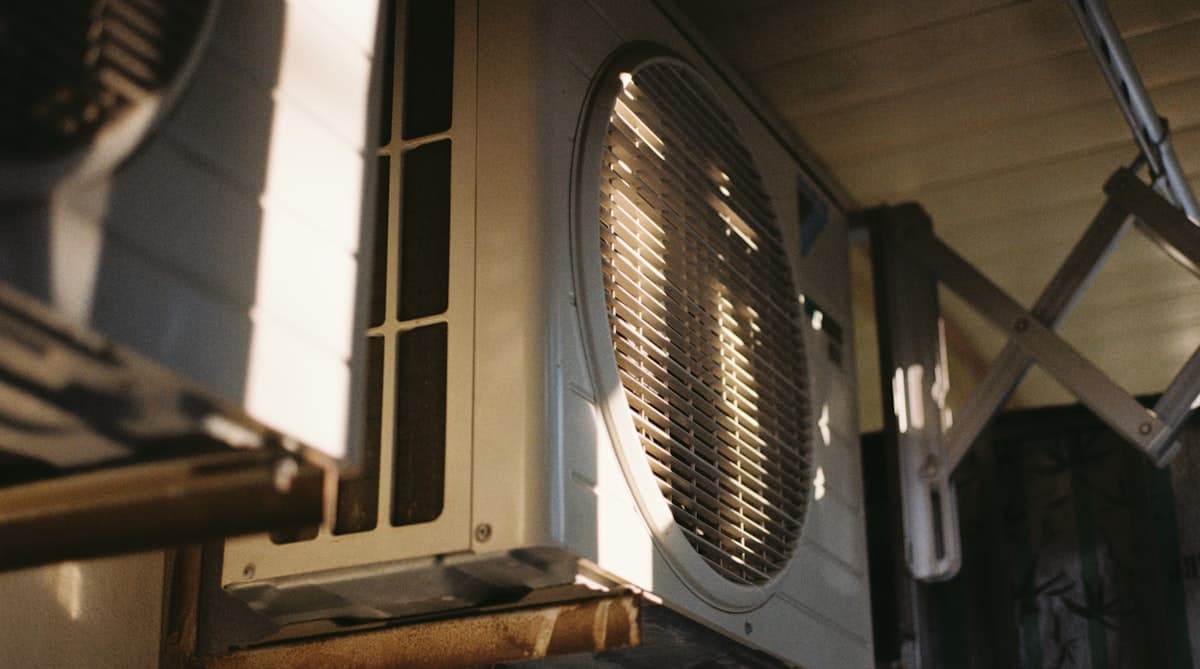
Step 4: Inspect the Outdoor Condenser Unit
The outdoor condenser is where your AC releases absorbed heat. If it cannot do so efficiently, cooling performance drops significantly.
Clear debris and maintain clearance. Remove leaves, grass clippings, mulch, and debris from around the unit. Maintain at least 2 feet of clearance on all sides and 5 feet above. Trim back shrubs and overhanging branches.
Clean the condenser coils. Dirt, pollen, and cottonwood fluff coat the aluminum fins and reduce heat transfer.
- Turn off power at the outdoor disconnect switch or breaker.
- Remove large debris by hand or with a soft brush.
- Spray the fins from the inside out with a garden hose, working top to bottom. Use a gentle stream — never a pressure washer, which will flatten the fins.
- Let the unit dry before restoring power.
Check that the unit is level. A condenser that is significantly off-level can develop compressor lubrication problems. Level a shifted pad by packing gravel or sand underneath.
Check the fan. It should spin freely without wobbling or scraping. If it is not spinning when the unit is running, the fan motor or run capacitor may have failed.
Step 5: Check for a Frozen Evaporator Coil
A frozen evaporator coil is one of the most common reasons an AC runs but does not cool. The evaporator coil sits inside the air handler, where refrigerant absorbs heat from indoor air. When airflow or refrigerant balance is disrupted, moisture on the coil freezes and ice builds until the system cannot move air.
Signs of a Frozen Coil
- Ice on the refrigerant lines — frost or ice on the copper lines running between the indoor and outdoor units.
- Warm air from the vents — the system runs but supply air is room temperature.
- Water around the air handler — a thawing coil produces more water than the drain pan can hold.
- Short cycling — the compressor runs briefly, shuts off, and repeats.
How to Thaw It
- Turn the thermostat to OFF to stop the compressor.
- Set the fan to ON (not AUTO). This pushes warm air across the frozen coil to speed thawing.
- Wait 2 to 4 hours. Do not chip or scrape ice — you will damage the fins or puncture a refrigerant line.
- Place towels around the air handler to catch meltwater.
- After the coil thaws fully, replace the air filter if needed, switch back to COOL, and monitor for one hour.
What Causes Coils to Freeze
- Dirty air filter — the most frequent cause, restricting airflow.
- Low refrigerant — a leak causes remaining refrigerant to over-expand and over-cool the coil.
- Blocked supply vents — make sure all vents are open and unobstructed by furniture or curtains.
- Failing blower motor — insufficient air movement drops the coil below freezing.
If the coil freezes again after thawing and replacing the filter, the cause is likely low refrigerant or a mechanical failure requiring professional service.
Step 6: Check the Condensate Drain Line
Air conditioners remove humidity as part of cooling. Moisture collects in a drain pan beneath the evaporator coil and flows through a PVC condensate drain line. Over time, algae, mold, and sediment clog this line.
When blocked, water backs up into the pan. Many systems have a float switch that shuts the AC off when water rises too high — a safety feature to prevent water damage. If your AC stops suddenly and you see standing water in the drain pan, a clogged condensate line is likely.
How to Clear It
Method 1: Wet/dry vacuum. Connect a shop vacuum to the outdoor end of the condensate drain line. Seal the connection with a rag to create suction and run the vacuum for 2 to 3 minutes. This pulls the clog out and is the most effective method for stubborn blockages.
Method 2: Vinegar flush. Find the drain line access point — a T-shaped PVC fitting with a cap near the indoor air handler. Remove the cap, pour one cup of white vinegar into the line, and wait 30 minutes. Follow with warm water and confirm flow at the outdoor exit.
Prevention: Pour a quarter cup of vinegar into the access point monthly during cooling season. Condensate drain line tablets (slow-dissolving algaecide) placed in the drain pan also help.
Step 7: Listen for Unusual Sounds
Different sounds point to different problems.
Repeated clicking (compressor does not start) — failing relay, contactor, or control board. The contactor is a $20 to $50 part, but replacement involves high-voltage connections.
Buzzing or humming from the outdoor unit — often a failing run or start capacitor. The capacitor stores the charge needed to start the compressor and fan motors. This is one of the most common AC repairs, costing $150 to $300 for parts and labor.
Screeching or squealing — a worn blower belt (on older belt-driven systems), failing motor bearings, or a compressor issue. If you hear a loud screech from the compressor, turn the system off immediately to prevent catastrophic damage.
Banging or clanking — a broken internal component, a loose fan blade, or a loose mounting bolt. Shut off the system and call a technician.
Hissing or bubbling — a possible refrigerant leak. Refrigerant is regulated by the EPA, and only certified technicians may legally handle it.
When to Call a Professional
Some issues are beyond safe DIY scope. Call a licensed HVAC technician for:
- Anything involving refrigerant. Handling requires EPA Section 608 certification. Low refrigerant means a leak that must be found and repaired before recharging — adding refrigerant without fixing the leak wastes money and is illegal.
- Electrical component replacement. Capacitors, contactors, and control boards carry dangerous voltages.
- Compressor problems. Replacement costs $1,200 to $2,500 including labor and requires specialized tools.
- Repeated breaker trips. This signals a short circuit, grounded compressor, or failing motor.
- Repeated freeze-ups. After ruling out the filter and airflow, the cause is likely low refrigerant or a metering device malfunction.
A diagnostic service call costs $75 to $150, and most technicians apply that fee toward repairs. Have questions about your AC issue? Contact us and we will help point you in the right direction.
Seasonal Maintenance to Prevent AC Problems
Most breakdowns are preventable with a consistent routine.
DIY Maintenance
- Replace the air filter every 30 to 90 days. Check monthly during peak cooling season (June through August).
- Keep the condenser clear. Maintain 2 feet of clearance and hose down the coils two to three times per season.
- Flush the condensate drain line with vinegar at the start and midpoint of cooling season.
- Clean supply vents and return grilles. Vacuum dust and ensure none are blocked by furniture.
- Test the thermostat at the start of each season by setting it 5 degrees below room temperature and confirming the system starts.
Professional Maintenance
Schedule a tune-up annually, ideally in early spring. A tune-up costs $75 to $200 and includes checking refrigerant levels, testing electrical connections, cleaning coils, lubricating motors, and inspecting the condensate system. Annual service improves efficiency by 5 to 15 percent and reduces mid-summer breakdowns. Many HVAC companies offer maintenance plans for $150 to $300 that cover both heating and cooling tune-ups with repair discounts.
AC Repair Cost Reference
| Repair | Typical Cost (Parts + Labor) |
|---|---|
| Capacitor replacement | $150 - $300 |
| Contactor replacement | $150 - $350 |
| Thermostat replacement | $100 - $400 |
| Refrigerant recharge | $200 - $500 |
| Fan motor replacement | $300 - $700 |
| Evaporator coil cleaning | $200 - $600 |
| Condensate drain clearing | $100 - $250 |
| Refrigerant leak repair | $500 - $1,500 |
| Compressor replacement | $1,200 - $2,500 |
| Full system replacement | $3,500 - $7,500 |
Costs vary by region and contractor. Always get two to three quotes for any repair over $500.
Do Not Wait for a Complete Breakdown
A struggling air conditioner does not fix itself. A dirty filter can cascade into a frozen coil, a strained compressor, and total system failure costing thousands. The seven steps above take less than an hour, cost little or nothing, and resolve the majority of common AC problems.
If you have worked through every step and the system still is not cooling, bring in a professional. The diagnostic cost is modest, and catching a developing problem early almost always saves money compared to waiting for a complete failure.
Editorial note: This guide was written and reviewed by our editorial team. Cost estimates reflect national averages and may vary by region. Read our editorial standards.
Frequently Asked Questions
Related Articles
How to Install a Smart Thermostat: Step-by-Step Guide
Install a smart thermostat yourself in under an hour. Covers compatibility, wiring, setup, and configuration for Nest, Ecobee, and Honeywell thermostats.
HVAC Maintenance Checklist: Seasonal Guide for Homeowners
Keep your heating and cooling system running efficiently with this seasonal HVAC maintenance checklist. Covers filter changes, coil cleaning, ductwork inspection, and more.