How to Install a Ceiling Fan Step by Step
By Editorial Team
Last updated: February 17, 2026
Why Install a Ceiling Fan
A ceiling fan is one of the most cost-effective comfort upgrades you can make. In summer, the downdraft creates a wind-chill effect that lets you raise the thermostat by 4 to 6 degrees without sacrificing comfort. In winter, reversing the fan direction pushes warm air that collects near the ceiling back down into the living space. The result is lower energy bills year-round and a more comfortable home.
If you have an existing ceiling light fixture, you already have power at the location and the project is well within reach for a homeowner with basic electrical experience. Plan for two to three hours from start to finish.
Before You Start
Confirm the Electrical Box
This is the most important step and the one most often overlooked. Ceiling fans are heavy and vibrate when running. A standard plastic or lightweight metal electrical box designed for a light fixture will not safely support a fan.
- Turn off the breaker that controls the ceiling fixture.
- Remove the existing fixture and inspect the electrical box.
- Look for a label on the box that says "Acceptable for Fan Support" or "Rated for Ceiling Fan." If there is no such label, the box must be replaced.
- If you need a new box, purchase a fan-rated brace box that mounts between ceiling joists from above the drywall or through the existing hole. Expandable brace bars are available for about $15 to $30 and are designed to install without attic access.
Choose the Right Fan Size
Fan size is measured by blade span. The wrong size fan will look awkward and will not move air effectively.
| Room Size | Recommended Blade Span |
|---|---|
| Up to 75 sq ft (small bedroom, bathroom) | 29 - 36 inches |
| 76 - 144 sq ft (medium bedroom, office) | 36 - 42 inches |
| 144 - 225 sq ft (large bedroom, living room) | 44 - 50 inches |
| 225 - 400 sq ft (great room, open plan) | 50 - 54 inches |
| Over 400 sq ft | Two fans, or 60+ inches |
The fan blades should hang at least 7 feet above the floor and 8 to 10 inches below the ceiling for optimal airflow. For rooms with low ceilings, use a flush-mount (hugger) fan that mounts directly against the ceiling without a downrod.
Tools and Materials
| Item | Approximate Cost |
|---|---|
| Ceiling fan with light kit | $50 - $300 |
| Fan-rated brace box (if needed) | $15 - $30 |
| Non-contact voltage tester | $15 - $25 |
| Screwdrivers (Phillips and flathead) | $5 - $10 |
| Wire strippers | $8 - $15 |
| Wire nuts (usually included with fan) | $3 - $5 |
| Adjustable wrench | $8 - $15 |
| Stepladder | $30 - $80 |
Safety Warnings
Electrical work requires careful attention. Follow these rules throughout the project.
- Always turn off the breaker controlling the circuit before touching any wires. Use a non-contact voltage tester to confirm power is off.
- Never work from a chair or unstable surface. Use a proper stepladder rated for your weight.
- Do not support the fan by its wires. Most fans include a mounting bracket with a hook or slot that lets the fan hang while you connect the wiring. Use it.
- If you find aluminum wiring (silver-colored instead of copper) or wiring that you do not understand, stop and call a licensed electrician.
Step 1: Remove the Existing Light Fixture
- Turn off the breaker and verify power is off with a voltage tester at the fixture wires.
- Remove the light fixture by unscrewing the mounting hardware and disconnecting the wire nuts.
- If the electrical box is not fan-rated, remove it and install a fan-rated brace box following the manufacturer's instructions. Expandable brace models slide through the existing hole, expand between the joists, and lock in place with the included box.
Step 2: Install the Mounting Bracket
Every ceiling fan comes with a mounting bracket specific to that model. The bracket screws into the fan-rated electrical box and provides the connection point for the fan motor housing.
- Attach the mounting bracket to the electrical box using the screws provided. Hand-tighten first, then snug with a screwdriver. The bracket must be secure — it carries the full weight of the fan.
- Pull the house wires through the center opening of the bracket.
- If your fan uses a downrod, thread the wires from the fan motor through the downrod and attach the downrod to the motor housing according to the manufacturer's directions. Secure the downrod with the locking pin or set screw.
Step 3: Hang the Fan and Connect the Wiring
- Lift the fan motor assembly and hook it onto the mounting bracket. Most brackets have a slot or hook that supports the fan's weight while you work on the wiring. This frees both hands.
- Connect the wires using wire nuts:
- Black (hot) wire from the ceiling to black wire from the fan motor. This powers the fan.
- White (neutral) wire from the ceiling to white wire from the fan.
- Green or bare copper (ground) wire from the ceiling to green wire from the fan. Also connect the ground to the mounting bracket's ground screw if one is provided.
- If your fan has a separate light kit, there may be a blue wire for the light. Connect it to the black ceiling wire alongside the fan's black wire, unless you have a separate switch leg (two hot wires at the ceiling), in which case connect the blue wire to the second hot wire for independent switch control.
- Tuck the wire connections neatly into the electrical box. No bare copper should be visible outside of wire nuts.
Understanding the Wiring Configurations
- Single switch: One wall switch controls both the fan and the light. You use the pull chains on the fan to independently control speed and light. The ceiling box will have one black (hot), one white (neutral), and one ground wire.
- Dual switch: Two wall switches — one for the fan, one for the light. The ceiling box will have two black (or one black and one red) hot wires, one white neutral, and one ground. Connect the fan motor's black wire to one hot wire and the light kit's blue wire to the other.
- Remote control: If your fan includes a remote receiver module, it installs between the ceiling wires and the fan wires. Follow the manufacturer's wiring diagram, which typically involves connecting all ceiling hot and neutral wires to the receiver's input side, and the fan and light wires to the receiver's output side.
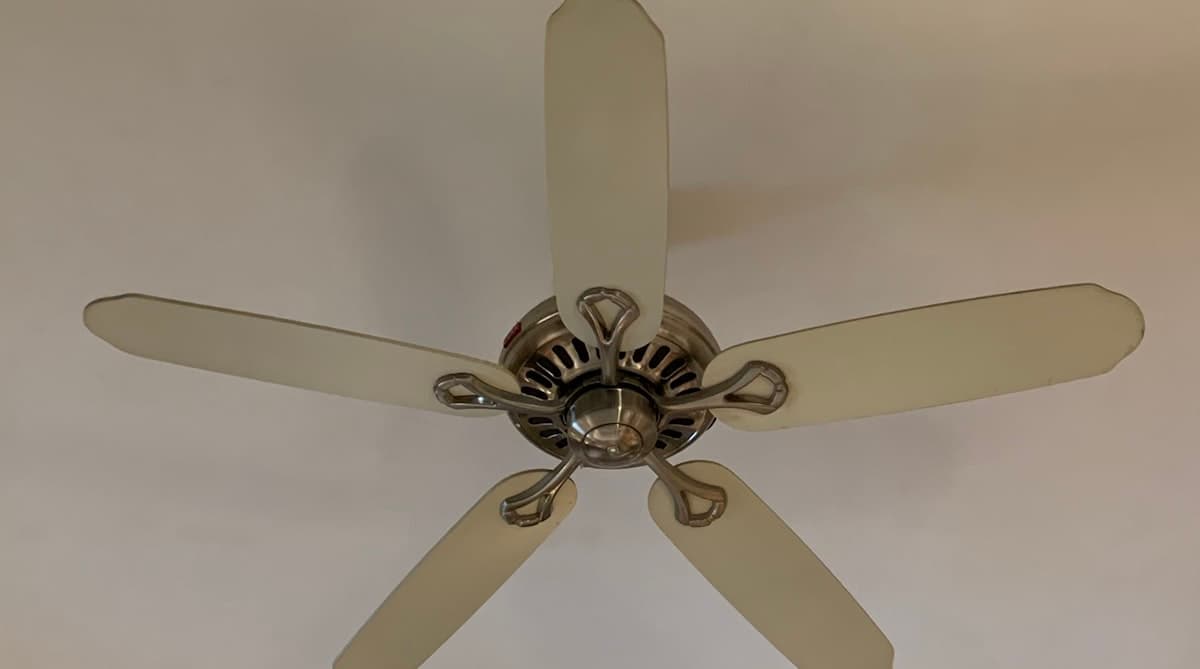
Step 4: Attach the Fan Blades
- Secure each blade bracket to the motor housing using the included screws. Most fans have four or five blades.
- Attach each blade to its bracket. Hand-tighten the screws, then snug them firmly. Loose blade screws are the most common cause of wobbling.
- Verify all blades are the same distance from the ceiling by holding a yardstick vertically from the ceiling to the tip of each blade. If one is off, check that its bracket screws are tight and that the bracket is not bent.
Step 5: Install the Light Kit
If your fan has an integrated light kit:
- Connect the light kit plug or wires to the matching connection on the bottom of the fan motor housing. Many modern fans use a quick-connect plug for the light kit.
- Secure the light kit housing with the screws or locking ring provided.
- Install the light bulbs. Use the type and wattage specified in the fan manual. LED bulbs are recommended for cooler operation and longer life.
- Attach the glass globe or shade.
Step 6: Test and Balance
- Turn the breaker back on.
- Turn on the wall switch and test the fan at each speed using the pull chain. Then test the light.
- Watch for wobbling. Some wobble is normal during the first few minutes as the motor seats itself, but persistent wobble should be corrected.
How to Fix a Wobbling Ceiling Fan
- Check blade screws. Tighten every screw on every blade bracket and blade.
- Check blade alignment. Measure the distance from the ceiling to the tip of each blade. If one blade is higher or lower, gently bend its bracket up or down to match the others.
- Use a balancing kit. Most fans include a plastic balancing clip and adhesive weights. Place the clip on one blade, run the fan, and move the clip to each blade in turn. When you find the blade where wobble decreases the most, attach an adhesive weight to the top of that blade near the clip position.
Setting the Fan Direction
Ceiling fans have a small switch on the motor housing that reverses the blade rotation.
- Summer (counterclockwise when viewed from below): Creates a downward breeze. You should feel air movement when standing under the fan.
- Winter (clockwise when viewed from below): Draws air upward and pushes warm air collected at the ceiling down along the walls. Run the fan on low speed in winter so you do not feel a direct draft.
Switch the direction at the start of each season for maximum energy savings.
When to Call an Electrician
This project is manageable for most homeowners, but some situations call for a professional:
- No existing electrical box at the ceiling location (new wiring needs to be run)
- You want to add a new wall switch or convert from a single switch to a dual switch
- The existing wiring is aluminum, knob-and-tube, or otherwise non-standard
- You are not comfortable working overhead with live-wire connections
- Your ceiling is unusually high (vaulted or cathedral) and requires special mounting hardware and extended downrods
Hiring a licensed electrician for these situations is a smart investment in safety. The cost is modest compared to the risk of an improperly wired fan.
Maintenance Tips
- Dust the blades monthly with a microfiber cloth or damp rag. Dust accumulation causes imbalance and reduces airflow.
- Tighten blade screws once a year.
- Lubricate the motor if the manufacturer recommends it (some motors are permanently sealed and do not require lubrication).
- Replace any light bulbs with the correct type — oversized bulbs can overheat the light kit housing.
A properly installed ceiling fan provides comfort and energy savings for 15 to 20 years with minimal maintenance. Take your time with the installation, double-check every connection, and enjoy the improved airflow.
Editorial note: This guide was written and reviewed by our editorial team. Cost estimates reflect national averages and may vary by region. Read our editorial standards.
Frequently Asked Questions
Related Articles
Window Replacement Cost: What to Expect in 2026
How much does window replacement cost? Complete guide to window prices by type, frame material, and installation method with tips to save money.
DIY Home Energy Audit: Find Where Your Home Is Wasting Energy
Perform a DIY home energy audit to identify insulation gaps, air leaks, and inefficient appliances. Save money on utility bills with this room-by-room guide.
Garage Door Repair: Troubleshooting Common Problems
Garage door won't open? Diagnose and fix common garage door problems including opener issues, broken springs, misaligned sensors, and noisy operation.