How to Replace an Electrical Outlet Safely
By Editorial Team
Last updated: February 3, 2026
Why Replace an Electrical Outlet
Electrical outlets wear out over time. If a plug falls out of the receptacle, the outlet feels warm to the touch, you see discoloration or cracking on the faceplate, or the outlet simply does not work, it is time for a replacement. A worn outlet is not just inconvenient — it can be a fire hazard.
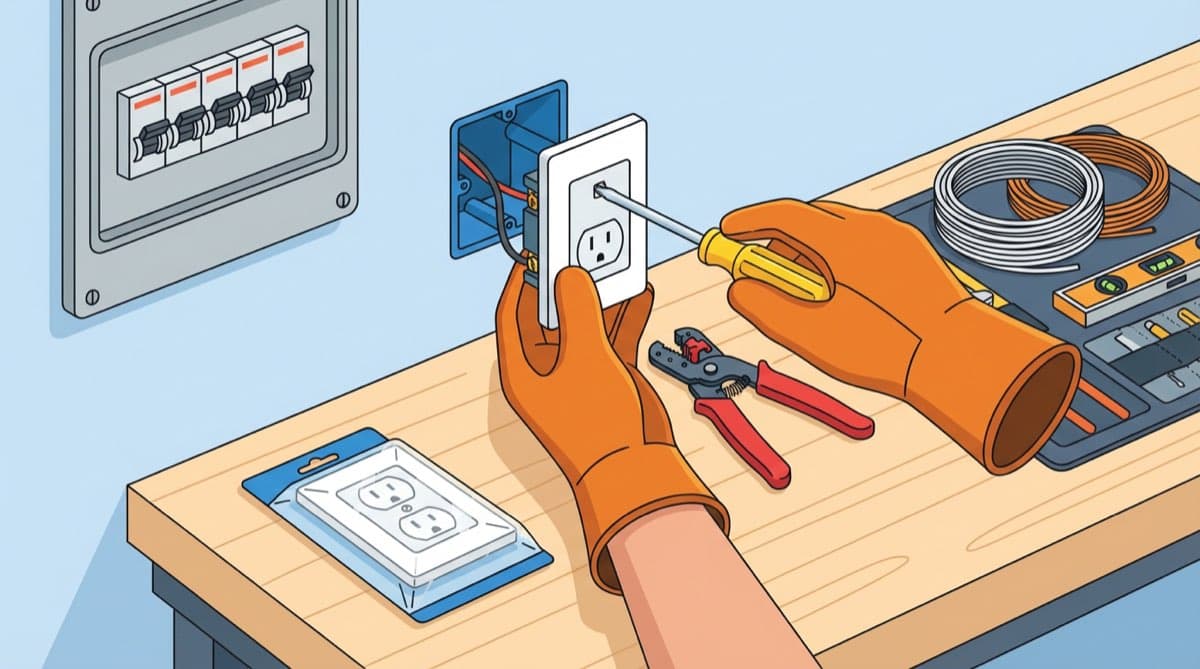
Replacing a standard duplex outlet is one of the more approachable electrical DIY projects. With the right precautions, most homeowners can complete it in about 20 minutes.
Safety First
Electrical work demands respect. Before touching any wiring, follow these steps carefully.
Turn Off the Breaker
- Go to your home's electrical panel (breaker box).
- Identify the breaker that controls the circuit for the outlet you are replacing. If breakers are not labeled, plug a lamp or radio into the outlet and flip breakers one at a time until the device turns off.
- Flip the breaker to the OFF position.
- Place a piece of tape over the breaker switch so nobody accidentally turns it back on while you are working.
Test With a Voltage Tester
Never trust a breaker label alone. After flipping the breaker, use a non-contact voltage tester at the outlet to confirm there is no power. Hold the tester near each slot of the outlet. If it beeps or lights up, the circuit is still live — go back and find the correct breaker.
A non-contact voltage tester costs around $15 to $25 and is an essential tool for any homeowner doing electrical work.
Removing the Old Outlet
- Remove the faceplate by unscrewing the center screw.
- Remove the two screws holding the outlet to the electrical box (one at the top, one at the bottom).
- Gently pull the outlet out of the box, being careful not to touch the wires until you have confirmed power is off with your voltage tester one more time.
- Take a photo of the wiring before disconnecting anything. This gives you a reference for wiring the new outlet.
- Note the wire connections:
- Black (hot) wire — connected to the brass-colored screw on the outlet.
- White (neutral) wire — connected to the silver-colored screw.
- Green or bare copper (ground) wire — connected to the green screw.
- Loosen the terminal screws and remove the wires. If the wires are pushed into back-stab holes instead of wrapped around screws, insert a small flathead screwdriver into the release slot next to each hole to free the wire.
Wiring the New Outlet
Use a new outlet that matches the amperage of the circuit. Most residential outlets are 15-amp (on 14-gauge wire) or 20-amp (on 12-gauge wire). A 20-amp outlet has one T-shaped slot.
- Strip about 3/4 inch of insulation from each wire end if the existing stripped section looks damaged or corroded. Use wire strippers for a clean strip.
- Connect the black (hot) wire to a brass screw on the new outlet. Wrap the wire clockwise around the screw so tightening the screw pulls the wire tighter, then snug the screw firmly.
- Connect the white (neutral) wire to a silver screw using the same technique.
- Connect the green or bare ground wire to the green screw.
- If there are two sets of wires in the box (the circuit continues to another outlet downstream), connect one black wire to each brass screw and one white wire to each silver screw.
Avoid Back-Stab Connections
Many electricians advise against using the push-in (back-stab) holes on the back of the outlet. These connections can loosen over time and cause arcing. Always use the screw terminals for a more secure connection.
Installing the New Outlet
- Carefully fold the wires back into the electrical box in an accordion fashion. Do not force or kink them.
- Push the outlet into the box and secure it with the top and bottom mounting screws. Make sure the outlet sits flush and straight.
- Attach the faceplate.
- Go back to the breaker panel and flip the breaker to ON.
Testing the Outlet
Plug in a lamp or outlet tester to verify the outlet works correctly. If you have an outlet tester (a small plug-in device with three indicator lights, about $10), it will tell you whether the outlet is wired correctly or if you have a problem such as reversed polarity or an open ground.
If the outlet does not work, turn the breaker off again and double-check all connections. The most common issue is a loose wire that is not making solid contact with the screw terminal.
Tools and Materials
| Item | Approximate Cost |
|---|---|
| Non-contact voltage tester | $15 - $25 |
| Standard duplex outlet (15-amp) | $1 - $5 |
| Flathead and Phillips screwdrivers | $5 - $10 |
| Wire strippers | $8 - $15 |
| Outlet tester | $8 - $12 |
Replacing an outlet is a small project with a big impact on both safety and convenience. Take your time, respect the electricity, and do not hesitate to call a professional if anything looks unusual inside the box.
Editorial note: This guide was written and reviewed by our editorial team. Cost estimates reflect national averages and may vary by region. Read our editorial standards.
Frequently Asked Questions
Related Articles
Window Replacement Cost: What to Expect in 2026
How much does window replacement cost? Complete guide to window prices by type, frame material, and installation method with tips to save money.
DIY Home Energy Audit: Find Where Your Home Is Wasting Energy
Perform a DIY home energy audit to identify insulation gaps, air leaks, and inefficient appliances. Save money on utility bills with this room-by-room guide.
How to Install a Ceiling Fan Step by Step
Learn how to install a ceiling fan yourself with this complete guide. Covers wiring, mounting, balancing, and when to call an electrician.